Making your own intruments... (56K warning) - Here's a few pics of ones Ive made
30 posts
• Page 2 of 2 • 1, 2
![]() by ABAKUA » Fri Jun 24, 2005 7:44 am
by ABAKUA » Fri Jun 24, 2005 7:44 am
Cool replies! Great looking drums there!
As I posted earlier in this thread, I said I would post pics as I continued developing the gourds on their journey to becoming a Guiro/Chekere. I got home early today from work and decided to get started on one of the gourds, it will become a Super Guiro like the other one towards the beggining of this thread. Hope you enjoy my pics from a little earlier today...
Attachment: http://mycongaplace.com/forum/eng/uploa ... CN0700.JPG
-

ABAKUA - Site Admin
- Posts: 3189
- Joined: Mon Nov 29, 2004 11:59 pm
- Location: Earth
![]() by ABAKUA » Fri Jun 24, 2005 7:49 am
by ABAKUA » Fri Jun 24, 2005 7:49 am
The first lot of seeds/guts always falls out with relative ease.
Attachment: http://mycongaplace.com/forum/eng/uploa ... CN0704.JPG
Attachment: http://mycongaplace.com/forum/eng/uploa ... CN0704.JPG
-
ABAKUA - Site Admin
- Posts: 3189
- Joined: Mon Nov 29, 2004 11:59 pm
- Location: Earth
![]() by ABAKUA » Fri Jun 24, 2005 7:51 am
by ABAKUA » Fri Jun 24, 2005 7:51 am
Continued from previous page....
After alot of scooping, scratching, filing and sanding the rest of the guts come out... Here I have seperated the seeds to the left of the pic, will be used for future planting...
Edited By ABAKUA on 1119701091
Attachment: http://mycongaplace.com/forum/eng/uploa ... CN0706.JPG
After alot of scooping, scratching, filing and sanding the rest of the guts come out... Here I have seperated the seeds to the left of the pic, will be used for future planting...
Edited By ABAKUA on 1119701091
Attachment: http://mycongaplace.com/forum/eng/uploa ... CN0706.JPG
-
ABAKUA - Site Admin
- Posts: 3189
- Joined: Mon Nov 29, 2004 11:59 pm
- Location: Earth
![]() by ABAKUA » Fri Jun 24, 2005 7:54 am
by ABAKUA » Fri Jun 24, 2005 7:54 am
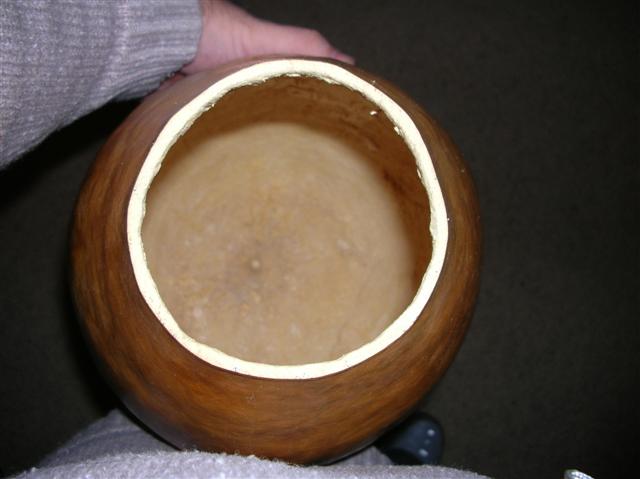
Still a little rough.. But the majority of it is out.. Tommorrow I will finish sanding out the inner body and begine preparing the template/design for the grooves.
Edited By ABAKUA on 1119599709
Attachment: http://mycongaplace.com/forum/eng/uploa ... CN0707.JPG
Edited By ABAKUA on 1119599709
Attachment: http://mycongaplace.com/forum/eng/uploa ... CN0707.JPG
-
ABAKUA - Site Admin
- Posts: 3189
- Joined: Mon Nov 29, 2004 11:59 pm
- Location: Earth
![]() by ABAKUA » Fri Jun 24, 2005 7:57 am
by ABAKUA » Fri Jun 24, 2005 7:57 am
Here's one as I packed everything up.. Started getting a bit cold to be outside.. (its currently winter)
Attachment: http://mycongaplace.com/forum/eng/uploa ... CN0705.JPG
Attachment: http://mycongaplace.com/forum/eng/uploa ... CN0705.JPG
-
ABAKUA - Site Admin
- Posts: 3189
- Joined: Mon Nov 29, 2004 11:59 pm
- Location: Earth
![]() by ABAKUA » Fri Jun 24, 2005 10:48 am
by ABAKUA » Fri Jun 24, 2005 10:48 am
Cleaned up a little more, also cut the top a bit more, making the opening a bit larger..
Edited By ABAKUA on 1119610139
Attachment: http://mycongaplace.com/forum/eng/uploa ... CN0708.JPG
Edited By ABAKUA on 1119610139
Attachment: http://mycongaplace.com/forum/eng/uploa ... CN0708.JPG
-
ABAKUA - Site Admin
- Posts: 3189
- Joined: Mon Nov 29, 2004 11:59 pm
- Location: Earth
![]() by ABAKUA » Fri Jun 24, 2005 10:51 am
by ABAKUA » Fri Jun 24, 2005 10:51 am
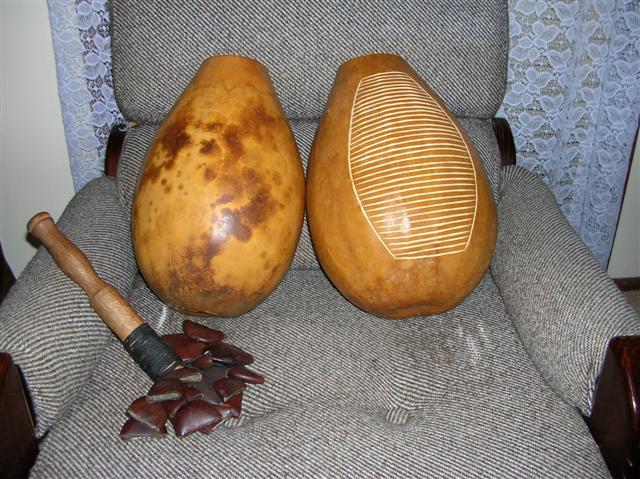
Transformation will be complete soon...
Still have the other one in the back yard to go, will post pics as I develop that one and also the gourd to be used as a chekere, but that one will be a few months before its dried and ready.
Attachment: http://mycongaplace.com/forum/eng/uploa ... CN0709.JPG
Still have the other one in the back yard to go, will post pics as I develop that one and also the gourd to be used as a chekere, but that one will be a few months before its dried and ready.
Attachment: http://mycongaplace.com/forum/eng/uploa ... CN0709.JPG
-
ABAKUA - Site Admin
- Posts: 3189
- Joined: Mon Nov 29, 2004 11:59 pm
- Location: Earth
![]() by captainquinto » Fri Jun 24, 2005 4:13 pm
by captainquinto » Fri Jun 24, 2005 4:13 pm
This thread has been truly inspirational! I am most definitely going to make some homemade percussion. For others that might want to try but don't know where to start,here is a good link: http://djembelfaq.drums.org/v8b.htm
It even talks about gourd selection and some places to get them if you can't grow your own.
Thanks to Abakua for the inspiration and great pic's!!
It even talks about gourd selection and some places to get them if you can't grow your own.
Thanks to Abakua for the inspiration and great pic's!!
Estne volumen in toga, an solum tibi libet me videre?
-

captainquinto - Posts: 122
- Joined: Sat Apr 23, 2005 6:00 pm
- Location: Southwest USA
![]() by ABAKUA » Sat Jun 25, 2005 12:09 pm
by ABAKUA » Sat Jun 25, 2005 12:09 pm
captainquinto wrote:Thanks to Abakua for the inspiration and great pic's!!
Im glad you appreciated the update and liked the new pics and Im happy it served as an inspiration for you!

I will continue to report and post pics on the progress of their development....

Edited By ABAKUA on 1119704802
-
ABAKUA - Site Admin
- Posts: 3189
- Joined: Mon Nov 29, 2004 11:59 pm
- Location: Earth
![]() by ABAKUA » Sun Jun 26, 2005 9:09 am
by ABAKUA » Sun Jun 26, 2005 9:09 am
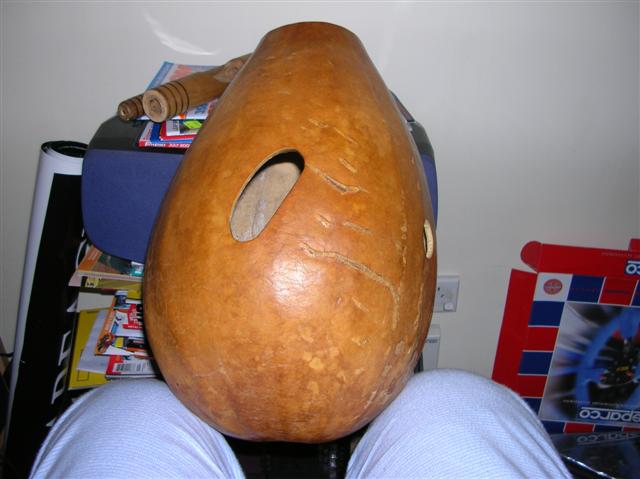
First I draw the template for the grooves onto the gourd with a lead pencil.
I use a thin flexible saw blade to keep the template relatively straight for drawing of lines.
I then secure the gourd with the assistance of a 2nd person, normally my father helps me here, (i do not like to use clamps for fear of damaging/cracking the gourd)
Once it is drawn on, I use a small metal file saw to gently cut into the gourd, not all the way through of course. This cuts in the outline of the grooves and its surrounding conga like pattern (as seen in pics on pages 1-3 of this thread)
Once the outlines are cut in, I use a long circular/cylindrical metal or wood file by hand to eat away through the cuts Ive made to create the grooves. Once happy with the grooves, I lightly use some sand paper to smoothe out the grooves.
For the rear (handle) I drill into the gourd with an electric drill as it is held by a 2nd person. I drill multiple holes apart from each other, length sufficient so that I may fit all my fingers minus the thumb into it eventually. I file away to get the complete 1 hole. Depending on the persons hand size is how big I generally make it. I have found the measurement I currently use is fairly universal, and for those with large hands I add a second round hole to the right for the thumb.
Though never needed by your average person as the first opening is sufficient to comfortably hold the guiro all night with no cramping issues or discomfort.
(refer to pics below of a guiro I previously made)
You then need to sand any sharp edges where drilling or filing has occured, mainly around the handle and opening of the guiro.
The gourd then needs to have 2-3 layers of 'wooden floor sealer' applied in order to keep it strong and waterproof.
I have been fairly busy this weekend to do it and get pic ups, but in the coming days I will post directions and step by step pics of all that I have posted above as as I develop the gourd seen on page 2 and 3 of this thread.
Keep your eyes on these pages for pics and the gourds development! By the end of it, anyone with some light tools, patience and a bit of creativity should be able to make a guiro/chekere of their own if you follow my directions!
Edited By ABAKUA on 1119777385
Attachment: http://mycongaplace.com/forum/eng/uploa ... d_back.JPG
-
ABAKUA - Site Admin
- Posts: 3189
- Joined: Mon Nov 29, 2004 11:59 pm
- Location: Earth
![]() by ABAKUA » Sun Jun 26, 2005 9:17 am
by ABAKUA » Sun Jun 26, 2005 9:17 am
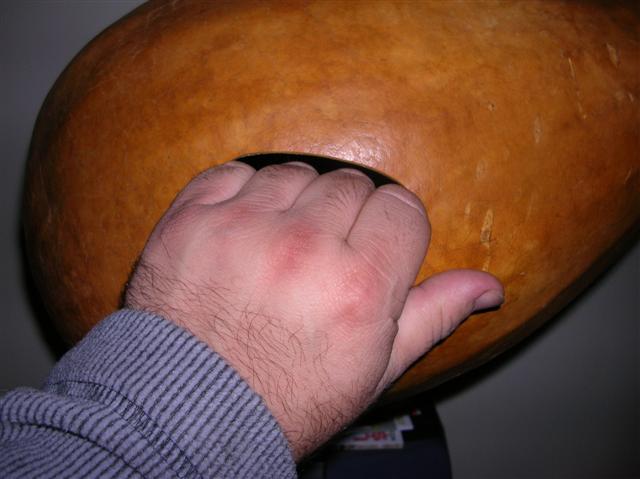
Guiro held from the handle below:
Attachment: http://mycongaplace.com/forum/eng/uploa ... k_held.JPG
Attachment: http://mycongaplace.com/forum/eng/uploa ... k_held.JPG
-
ABAKUA - Site Admin
- Posts: 3189
- Joined: Mon Nov 29, 2004 11:59 pm
- Location: Earth
30 posts
• Page 2 of 2 • 1, 2
Who is online
Users browsing this forum: No registered users and 25 guests