Guiro's. Step by Step "how to make" thread - Pics inside, how I made my guiro's.
![]() by ABAKUA » Tue Aug 23, 2005 4:48 am
by ABAKUA » Tue Aug 23, 2005 4:48 am
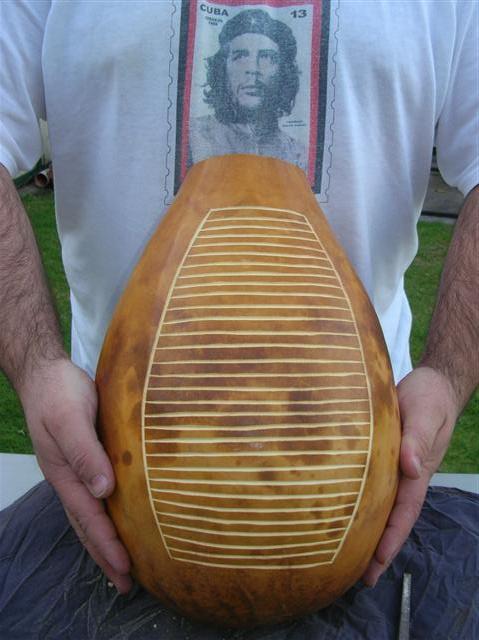
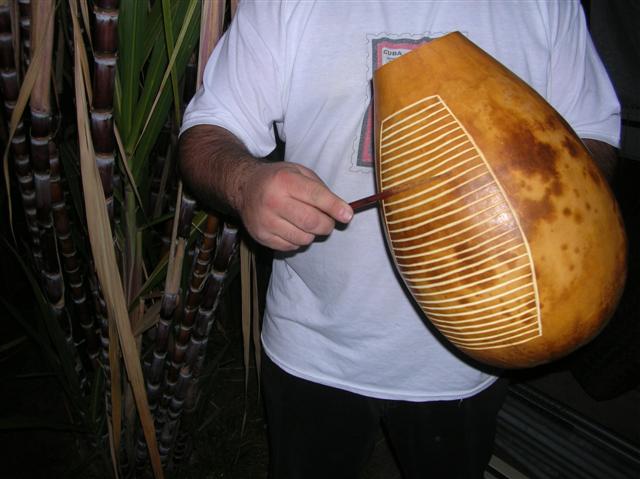
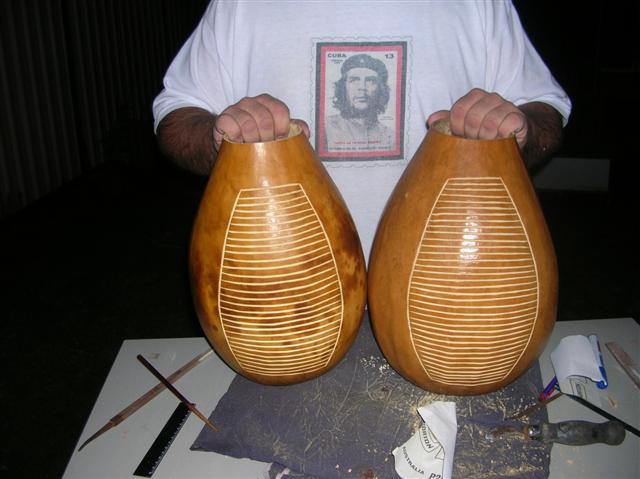
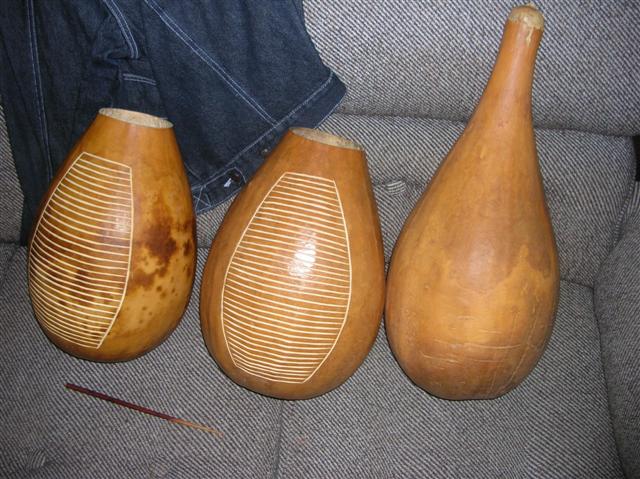
Here you see the gourd with all the grooves and surrounding pattern pretty much finished. Minor details are sorted out with further filing.
Attachment: http://mycongaplace.com/forum/eng/uploa ... CN1200.JPG
Attachment: http://mycongaplace.com/forum/eng/uploa ... CN1200.JPG
-

ABAKUA - Site Admin
- Posts: 3189
- Joined: Mon Nov 29, 2004 11:59 pm
- Location: Earth
![]() by steady freddy » Tue Aug 23, 2005 4:53 am
by steady freddy » Tue Aug 23, 2005 4:53 am
Yo Abakua!
Fantastic work, my friend!
Thanks for sharing it with all of us!
Happy Drumming,
Steady Freddy
Fantastic work, my friend!
Thanks for sharing it with all of us!
Happy Drumming,
Steady Freddy
-
steady freddy - Posts: 76
- Joined: Wed Mar 23, 2005 7:18 am
- Location: Perth, Western Australia
![]() by ABAKUA » Tue Aug 23, 2005 4:54 am
by ABAKUA » Tue Aug 23, 2005 4:54 am
Thanks Freddy! Im glad you appreciate my humble efforts!
Continued..
As far as the rear of it goes, ie where you will be holding the guiro from, Ive played guiros withthe traditional 2 holes in the back or the large opening for the hand, and Ive found that after a few tunes, my hand cramps up or I feel slight discomfort, not something I would be able to hold all night without discomfort.
So I came up with the idea of having and curved opening in the back, where you could fit your 4 fingers minus the thumb, it proved to be successful and now the guiro can be played all night and held with ease and no discomfort whatsoever.
Here's how we did it...
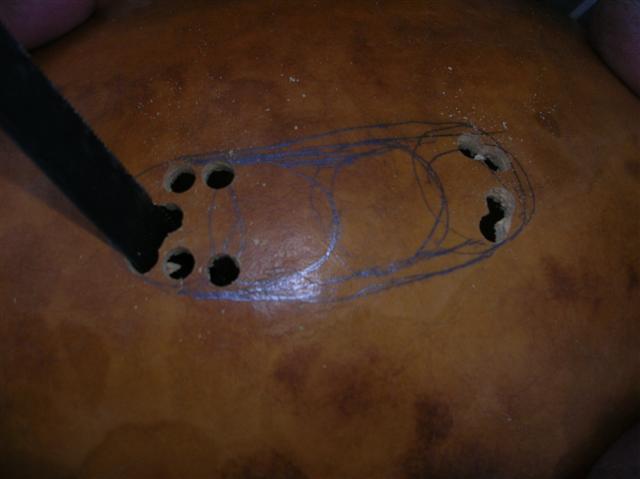
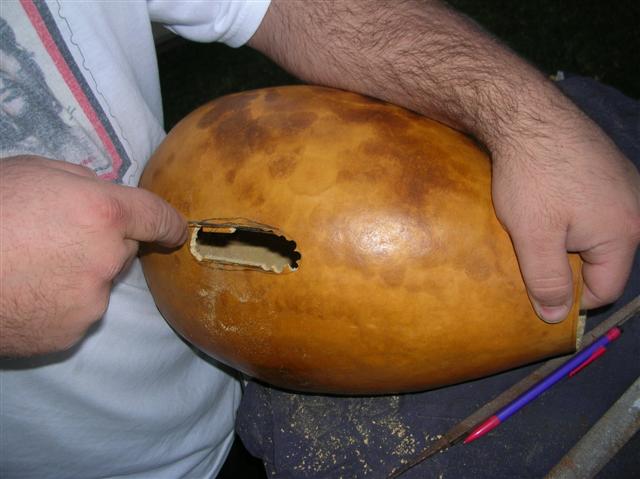
Mark out on the back of the gourd (directly opposite to the grooves) 4 circles where you see your 4 fingers holding it.
Then draw a curved shape, circulating the 4 afore mentioned circles. As seen below.
Edited By ABAKUA on 1124773005
Attachment: http://mycongaplace.com/forum/eng/uploa ... CN1203.JPG
Continued..
As far as the rear of it goes, ie where you will be holding the guiro from, Ive played guiros withthe traditional 2 holes in the back or the large opening for the hand, and Ive found that after a few tunes, my hand cramps up or I feel slight discomfort, not something I would be able to hold all night without discomfort.
So I came up with the idea of having and curved opening in the back, where you could fit your 4 fingers minus the thumb, it proved to be successful and now the guiro can be played all night and held with ease and no discomfort whatsoever.
Here's how we did it...
Mark out on the back of the gourd (directly opposite to the grooves) 4 circles where you see your 4 fingers holding it.
Then draw a curved shape, circulating the 4 afore mentioned circles. As seen below.
Edited By ABAKUA on 1124773005
Attachment: http://mycongaplace.com/forum/eng/uploa ... CN1203.JPG
-
ABAKUA - Site Admin
- Posts: 3189
- Joined: Mon Nov 29, 2004 11:59 pm
- Location: Earth
![]() by ABAKUA » Tue Aug 23, 2005 4:58 am
by ABAKUA » Tue Aug 23, 2005 4:58 am
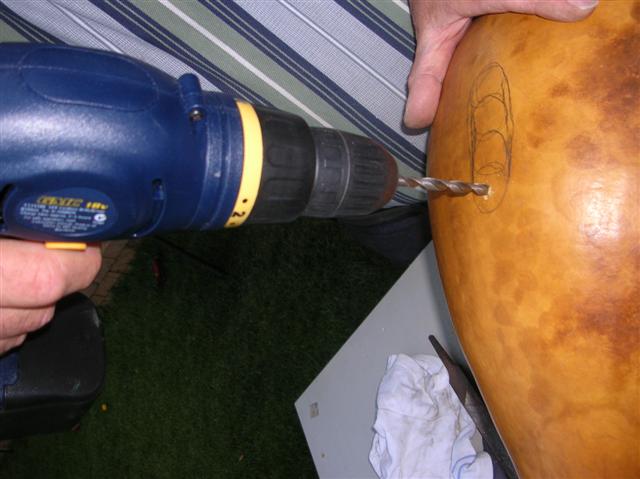
Using a power drill and a small to medium drill bit, make a few holes gently as seen below.
Attachment: http://mycongaplace.com/forum/eng/uploa ... CN1204.JPG
Attachment: http://mycongaplace.com/forum/eng/uploa ... CN1204.JPG
-
ABAKUA - Site Admin
- Posts: 3189
- Joined: Mon Nov 29, 2004 11:59 pm
- Location: Earth
![]() by ABAKUA » Tue Aug 23, 2005 5:00 am
by ABAKUA » Tue Aug 23, 2005 5:00 am
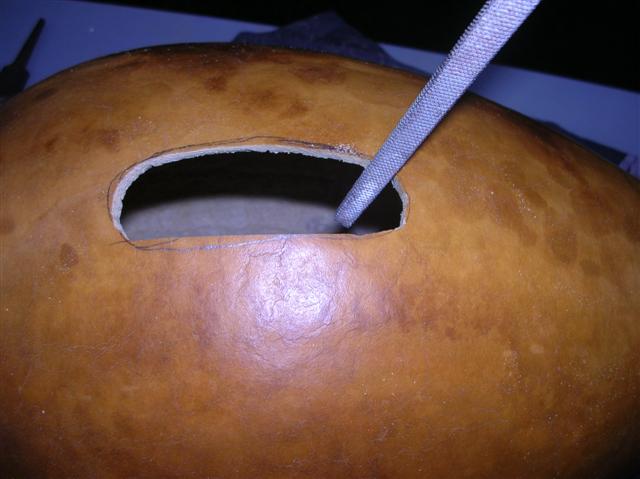
Once a few holes have been drilled, use the metal saw blade to cut in and gently begin cutting out the shape of the handle.
Edited By ABAKUA on 1124787233
Attachment: http://mycongaplace.com/forum/eng/uploa ... CN1205.JPG
Edited By ABAKUA on 1124787233
Attachment: http://mycongaplace.com/forum/eng/uploa ... CN1205.JPG
-
ABAKUA - Site Admin
- Posts: 3189
- Joined: Mon Nov 29, 2004 11:59 pm
- Location: Earth
![]() by ABAKUA » Tue Aug 23, 2005 5:03 am
by ABAKUA » Tue Aug 23, 2005 5:03 am
Continued...
Slowly the handle begins to take shape, remember to be gentle on the gourd no matter what tool you are using, it is a fragile instrument and being too rough or hasty will cause you to crack it. Slow and gentle is the key.
Attachment: http://mycongaplace.com/forum/eng/uploa ... CN1206.JPG
Slowly the handle begins to take shape, remember to be gentle on the gourd no matter what tool you are using, it is a fragile instrument and being too rough or hasty will cause you to crack it. Slow and gentle is the key.
Attachment: http://mycongaplace.com/forum/eng/uploa ... CN1206.JPG
-
ABAKUA - Site Admin
- Posts: 3189
- Joined: Mon Nov 29, 2004 11:59 pm
- Location: Earth
![]() by ABAKUA » Tue Aug 23, 2005 5:05 am
by ABAKUA » Tue Aug 23, 2005 5:05 am
Once the bulk of the handle is cut in.
Use a circular metal file to shape the handle.
Notice, the part for your palm should be straight, the part for the top of your hand should be curved.
Attachment: http://mycongaplace.com/forum/eng/uploa ... CN1207.JPG
Use a circular metal file to shape the handle.
Notice, the part for your palm should be straight, the part for the top of your hand should be curved.
Attachment: http://mycongaplace.com/forum/eng/uploa ... CN1207.JPG
-
ABAKUA - Site Admin
- Posts: 3189
- Joined: Mon Nov 29, 2004 11:59 pm
- Location: Earth
![]() by ABAKUA » Tue Aug 23, 2005 5:09 am
by ABAKUA » Tue Aug 23, 2005 5:09 am
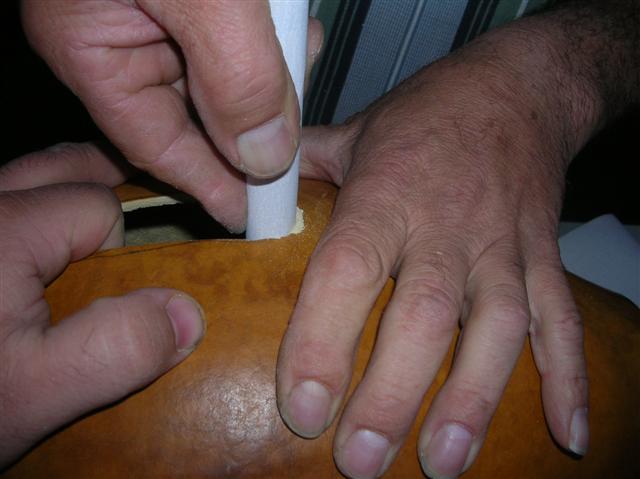
In order to get a nice round finish at the top and bottom of the handle, we wrapped the sand paper (dry 240 corse) around a thick texta and sanded in the shape.
Make sure to sand the inner section of the handle, and smoothe off any sharp or rough edges in the handle, this will prevent any blisters or cuts occuring while you are performing with the guiro.
Edited By ABAKUA on 1124787349
Attachment: http://mycongaplace.com/forum/eng/uploa ... CN1208.JPG
Make sure to sand the inner section of the handle, and smoothe off any sharp or rough edges in the handle, this will prevent any blisters or cuts occuring while you are performing with the guiro.
Edited By ABAKUA on 1124787349
Attachment: http://mycongaplace.com/forum/eng/uploa ... CN1208.JPG
-
ABAKUA - Site Admin
- Posts: 3189
- Joined: Mon Nov 29, 2004 11:59 pm
- Location: Earth
![]() by ABAKUA » Tue Aug 23, 2005 5:10 am
by ABAKUA » Tue Aug 23, 2005 5:10 am
With sand paper finish sanding and smoothing out any rough surfaces on the handle and opening of the guiro.
Here you will be finalizing the finish also for the shape of the handle.
Attachment: http://mycongaplace.com/forum/eng/uploa ... CN1209.JPG
Here you will be finalizing the finish also for the shape of the handle.
Attachment: http://mycongaplace.com/forum/eng/uploa ... CN1209.JPG
-
ABAKUA - Site Admin
- Posts: 3189
- Joined: Mon Nov 29, 2004 11:59 pm
- Location: Earth
![]() by ABAKUA » Tue Aug 23, 2005 5:13 am
by ABAKUA » Tue Aug 23, 2005 5:13 am

I prefer to use wooden chopsticks for scrapers.
Pic below: "Testing.... 1, 2, 3... " yep works fine!
Edited By ABAKUA on 1124774922
Attachment: http://mycongaplace.com/forum/eng/uploa ... CN1212.JPG
-
ABAKUA - Site Admin
- Posts: 3189
- Joined: Mon Nov 29, 2004 11:59 pm
- Location: Earth
![]() by ABAKUA » Tue Aug 23, 2005 5:20 am
by ABAKUA » Tue Aug 23, 2005 5:20 am
OK, next step is preparing the inside of the gourd for application of 'timber floor sealer' which will preserve strangth and ensure it becomes waterproof.
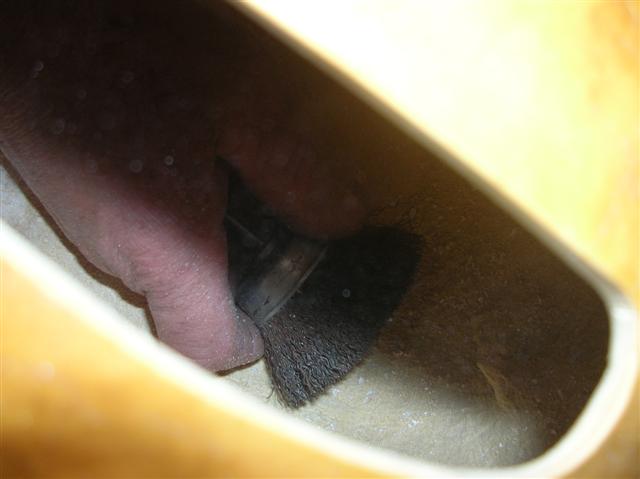
First, you should scrape the insides of the gourd with a metal brush, we used 2 brushes, a small one for the curved areas and a large one for the bulk sections, see below for pics.
This pic is taken looking inside the guiro from the handle.
Attachment: http://mycongaplace.com/forum/eng/uploa ... CN1217.JPG
-
ABAKUA - Site Admin
- Posts: 3189
- Joined: Mon Nov 29, 2004 11:59 pm
- Location: Earth
![]() by ABAKUA » Tue Aug 23, 2005 5:25 am
by ABAKUA » Tue Aug 23, 2005 5:25 am
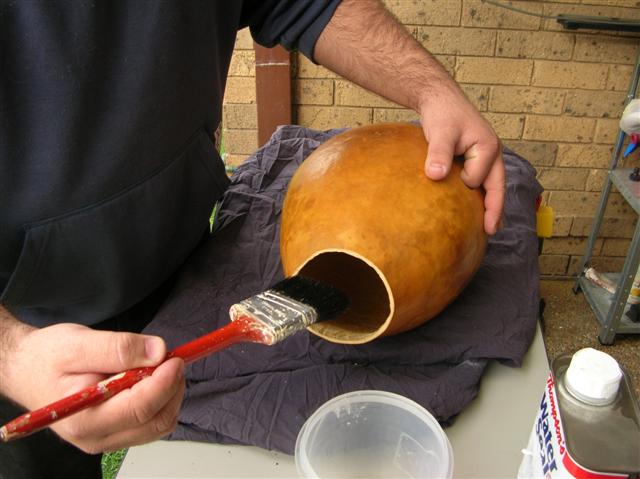
Once the metal brush has cleared out any loose dried up inner surfaces, make sure to clean it out thoroughly, all shavings/dust etc should be tipped out and blown out of the gourd.
Once satisfied with the inner surface, apply floor sealer to the inside of the gourd first. Use a clean paint brush.
Edited By ABAKUA on 1124787536
Attachment: http://mycongaplace.com/forum/eng/uploa ... CN1219.JPG
Once satisfied with the inner surface, apply floor sealer to the inside of the gourd first. Use a clean paint brush.
Edited By ABAKUA on 1124787536
Attachment: http://mycongaplace.com/forum/eng/uploa ... CN1219.JPG
-
ABAKUA - Site Admin
- Posts: 3189
- Joined: Mon Nov 29, 2004 11:59 pm
- Location: Earth
![]() by ABAKUA » Tue Aug 23, 2005 5:26 am
by ABAKUA » Tue Aug 23, 2005 5:26 am
Use 2 - 3 coats for the inside, allow 24hrs between coats.
Attachment: http://mycongaplace.com/forum/eng/uploa ... CN1221.JPG
Attachment: http://mycongaplace.com/forum/eng/uploa ... CN1221.JPG
-
ABAKUA - Site Admin
- Posts: 3189
- Joined: Mon Nov 29, 2004 11:59 pm
- Location: Earth
Who is online
Users browsing this forum: No registered users and 21 guests